Local greengrocer Gail Goat is pleased to announce the expansion of her business.
“I’ve doubled my retail retail space and now offer several more fruits and vegetables for sale. It is a huge step forward for my business, and I couldn’t be more excited,” she explained.
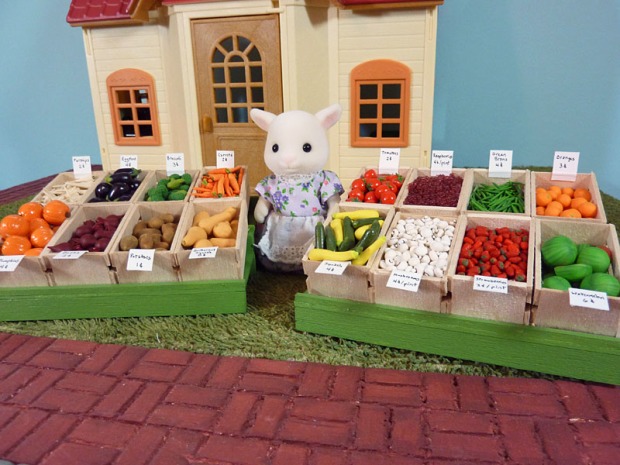
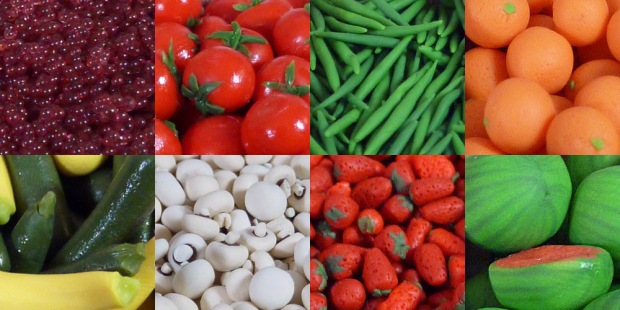
She now offers an expanded variety of fresh fruits and vegetables – on the day we visited she had watermelon, oranges, strawberries, and raspberries; as well as tomatoes, green beans, squash, and mushrooms on her new display.
Her young daughter, Gabby was quite enthusiastic over he mother’s new offerings, scampering up and popping a strawberry into her mouth.
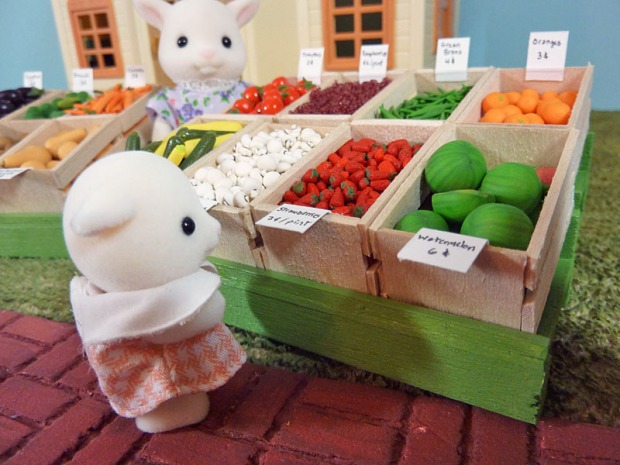
“Yum, Yum!” was Gabby’s review.
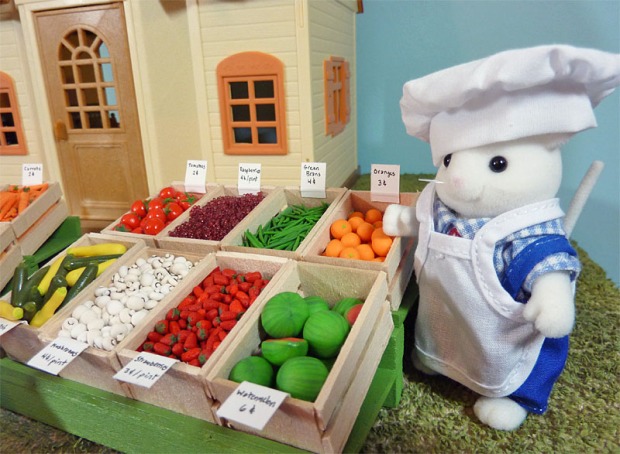
Local baker Mortimer Mouse is embracing the new, larger greengrocer’s: “I love to use fresh ingredients in my baking. And I never know when inspiration will strike. So having Mrs. Goat’s right down the street is perfect for me. I need some oranges today – doesn’t orange buttermilk pound cake sound delectable?”
The greengrocery is open from 9-5 every day and Mrs. Goat will be happy to fill a bag with the freshest foods just for you.
This is a project that I have had finished since the summer, but haven’t had a chance to share. I originally posted about the greengrocery a long time ago. Here is that post. After my first greengrocery post, I made a second display stand in order to write the tutorial on how to build it. Since that time it’s been floating around in my craft room waiting to be filled.
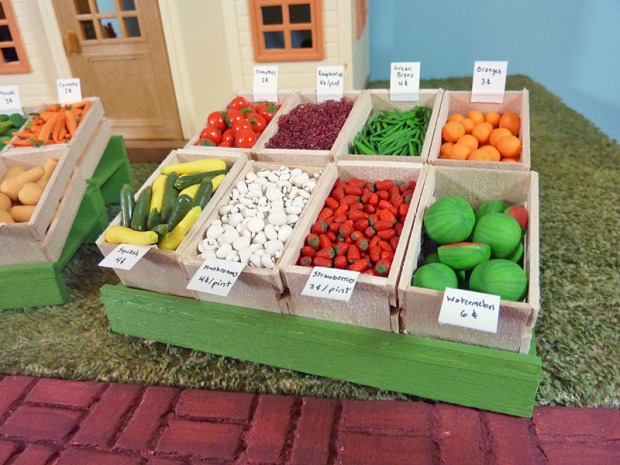
I started by making some wooden crates. The tutorial I used originally seems to be gone, so maybe I should do one soon. Then came the part that is both very tedious and very fun to me: filling the crates.
Most of the tutorials for the fruits and veggies have disappeared – so frustrating!
All but the raspberries were made with polymer clay. The raspberries are made out of thread, glue, and glass microbeads.
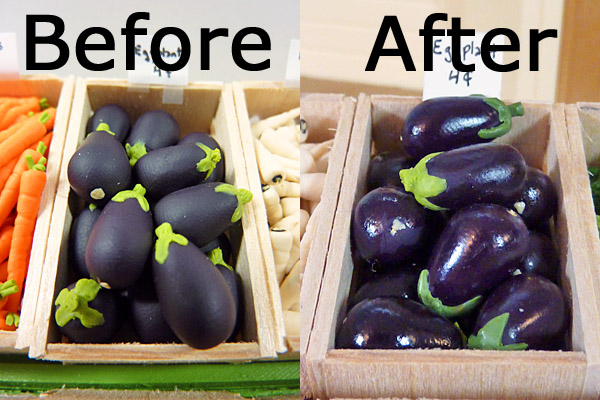
One technique that I learned during this project was varnishing my baked polymer clay. I researched a lot online, trying to find a varnish that wasn’t too expensive and that came in a not-too-large container. There are so many disagreements online about the best varnish to use, it was really overwhelming to sort through all the different opinions. But I settled on using “Pledge brand Floor Care Finish“. I cannot attest to how this product will hold up over time, but it looks nice now. I really love the dimension and realism it gives to those items that would be shiny in real life. The squash and tomatoes were given a quick single coat of the varnish, as was the flesh of the cut watermelon. I also went back to my previous greengrocer display and added varnish to the pumpkins and the eggplant. The eggplant, especially looks so much better with some shine (as long as you can ignore the fingerprints – and I can.
Do you think I should add tutorials for any of the things on this post? It’s so frustrating for so many online tutorials to disappear – would doing my own be helpful? I’m definitely not an expert at all. But I hate showing what I’ve made without at least offering some help on how to make something.
